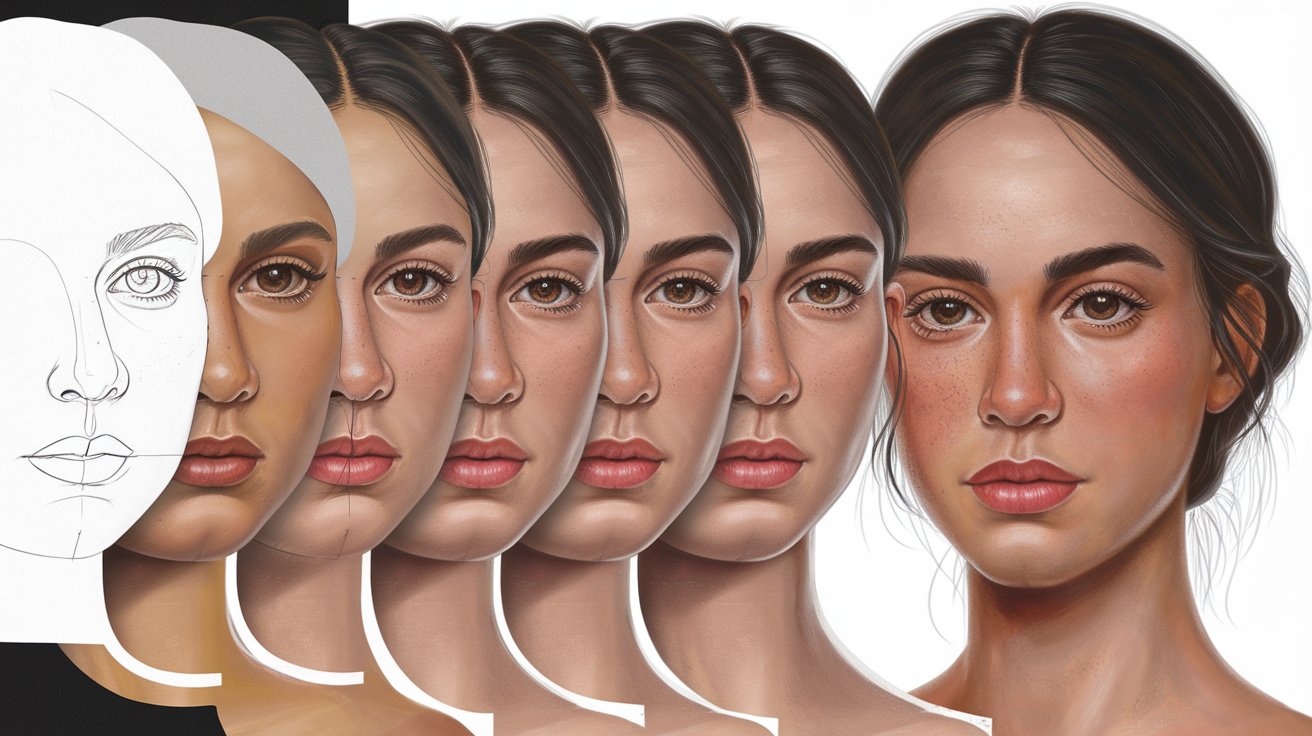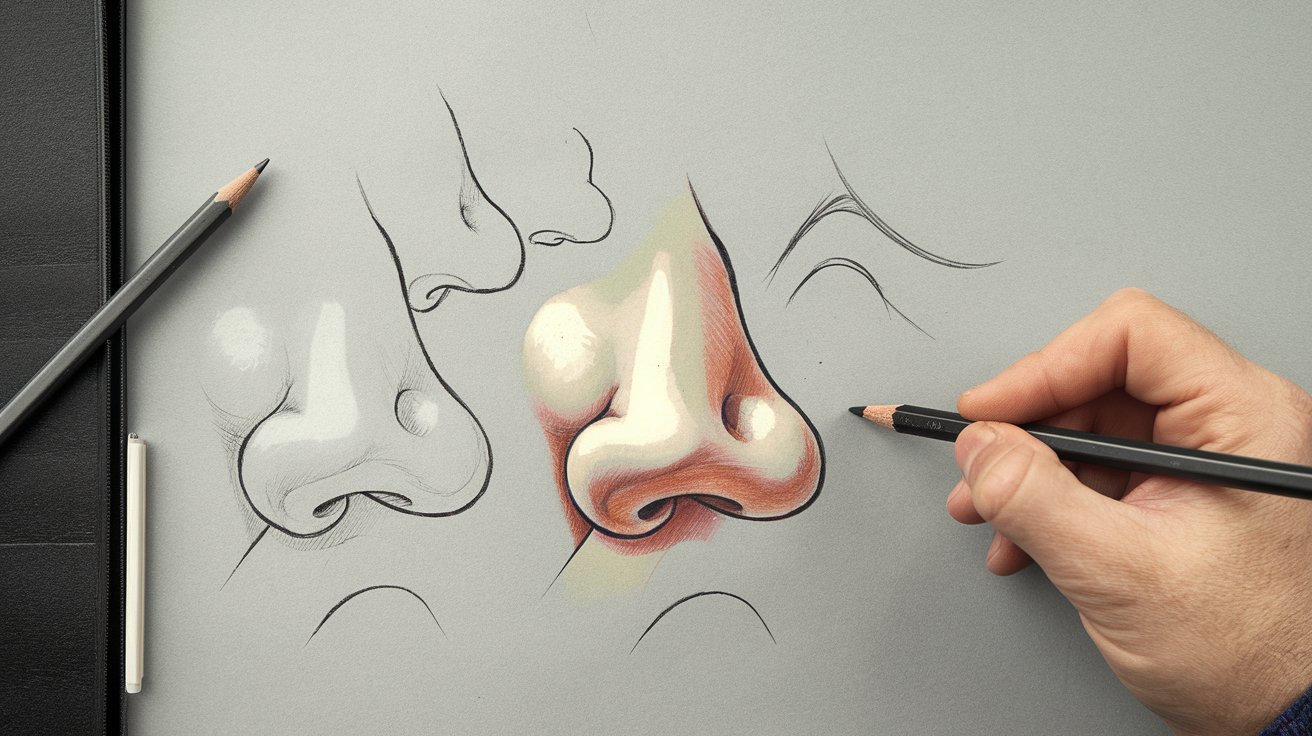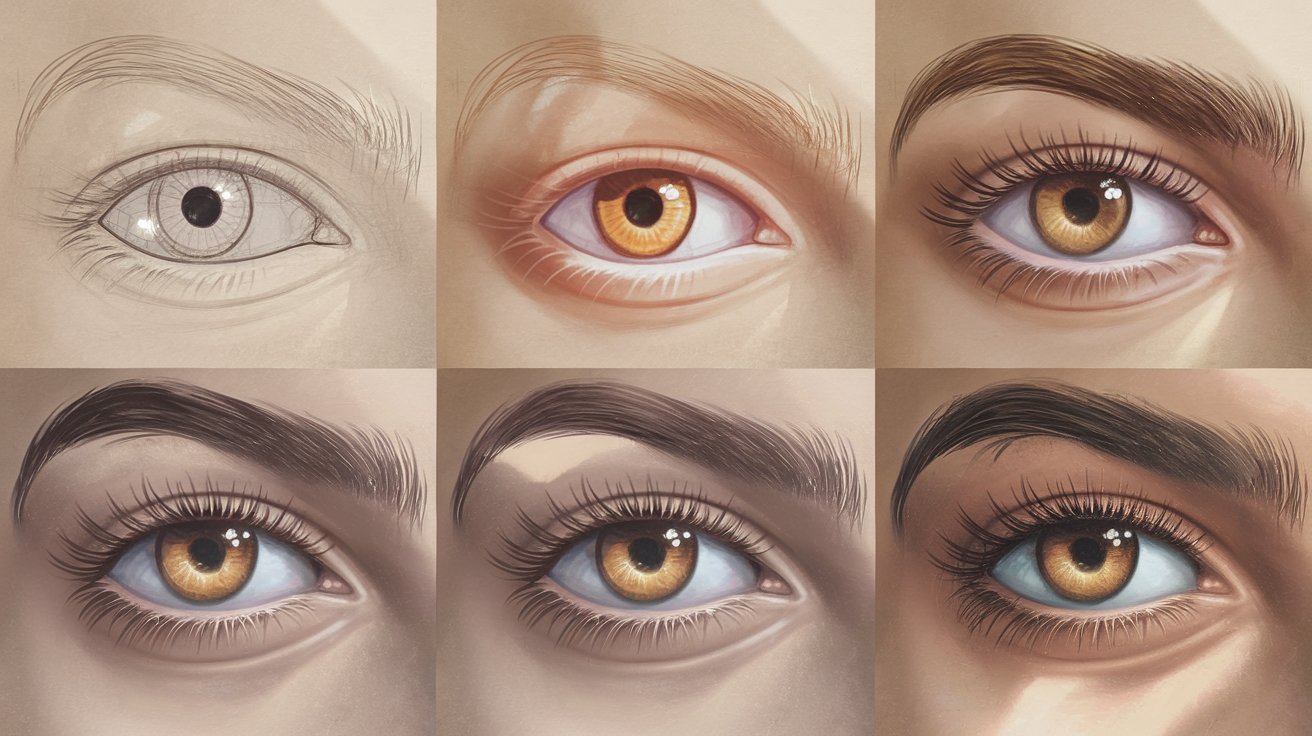
Learning how to draw eyes is one of the most essential skills for any artist, whether you’re sketching portraits, anime characters, or realistic illustrations. Eyes convey emotion, personality, and life to your artwork, making them the focal point of nearly every drawing. This comprehensive guide breaks down the eye drawing process into manageable steps, covering anatomy, proportions, shading techniques, and style variations. By the end, you’ll understand how to create realistic eyes that capture attention and bring your characters to life.
Understanding Eye Anatomy for Better Drawings
Before you can effectively draw realistic eyes, you need to understand the basic anatomical structure. The human eye sits within the eye socket, surrounded by protective bone structure that creates natural shadows and depth. The eyeball itself is spherical, which affects how light hits the surface and creates highlights. In 2026, anatomical studies show that the average adult eye measures approximately 24mm in diameter, though this appears smaller due to the eyelids covering portions of the eyeball.
The visible portions of the eye include the iris, pupil, sclera (white of the eye), eyelids, eyelashes, and surrounding skin folds. The iris is the colored portion containing intricate patterns unique to each individual, while the pupil appears as a black circle in the center that changes size based on lighting conditions. Understanding these components helps you create more accurate and believable eye drawings that capture realistic depth and dimension.
Essential Materials for Drawing Eyes
Choosing the right materials significantly impacts your ability to draw eyes effectively. For beginners in the United States market, starting with basic graphite pencils in varying hardness levels provides excellent control and versatility. A standard set includes HB, 2B, 4B, and 6B pencils, with harder pencils for light lines and softer ones for dark values and shading. Quality sketch paper with medium tooth texture works best, as it holds graphite well without excessive smudging.
Additional materials that enhance your eye drawing process include blending stumps for smooth transitions, kneaded erasers for lifting highlights, and vinyl erasers for clean corrections. Digital artists using tablets in 2026 benefit from pressure-sensitive styluses that mimic traditional pencil behavior. Many American art schools now recommend starting with traditional materials before transitioning to digital, as the tactile feedback builds fundamental skills that transfer across all mediums.
Step 1: Building the Foundation and Eye Socket
The first step in learning how to draw eyes step by step involves establishing the foundational structure of the eye socket. Start by lightly sketching a horizontal guideline where you want the eye positioned. The eye socket creates a recessed area where the eyeball sits, and understanding this three-dimensional space is crucial for realistic drawings. Sketch a shallow oval or almond shape to represent the basic eye opening, keeping your lines light and easily erasable at this stage.
The eye socket influences how shadows fall around the eye area, particularly above the upper eyelid and below the brow bone. In profile views, the eye socket becomes more apparent, showing the actual depth of the eye’s position within the skull. According to 2026 art instruction data from American academies, students who master the underlying bone structure produce more convincing eye drawings with proper dimensional qualities. Take time at this foundation stage to ensure correct proportions before adding details.
Step 2: Defining the Eye Shape and Eyelids
Once your foundation is established, refine the actual shape of the eye opening created by the eyelids. The upper eyelid typically curves more prominently than the lower lid, creating an asymmetrical appearance. The highest point of the upper eyelid sits slightly toward the inner corner rather than directly at the center. The lower eyelid curves more gently, often appearing almost straight in many eye shapes, though individual variations exist across different ethnicities and age groups.
Remember that eyelids have thickness and dimension, not just thin lines around the eyeball. The upper eyelid edge creates a visible shelf that casts shadows on the eyeball surface. The waterline, where the inner eyelid meets the eyeball, appears as a subtle line of lighter value. When drawing eyes for different demographics in the United States, consider variations in eyelid structure, epicanthic folds, and the degree of eyelid exposure. These anatomical differences make each eye unique and culturally authentic in your artwork.
Step 3: Positioning the Iris and Pupil Correctly
The iris and pupil placement determines where your subject is looking, making this step critical for conveying emotion and direction. The iris typically appears partially covered by the upper eyelid in a natural, relaxed eye position. Drawing the entire iris visible creates a surprised or startled expression. The iris diameter averages about 11-12mm in adults, appearing as a circle when viewed straight-on and as an ellipse when viewed from angles.
Center the pupil within the iris as a perfect circle, regardless of the viewing angle. The pupil size varies based on lighting conditions, ranging from 2-8mm in diameter. In bright light, pupils constrict to smaller sizes, while in dim conditions they dilate significantly. For realistic drawings, ensure the iris and pupil align consistently between both eyes if drawing a pair. According to 2026 portrait studies, iris and pupil misalignment is the most common error that makes eye drawings appear unfocused or unnatural to viewers.
Step 4: Adding Realistic Details and Textures
Details transform a basic eye sketch into a realistic, lifelike drawing. The iris contains intricate radial patterns extending from the pupil outward, resembling spokes on a wheel. These patterns vary in darkness and create natural texture. Add these details using short, radiating strokes rather than attempting to draw each individual fiber. The iris also features a limbal ring, a darker circle at the outer edge that adds depth and definition, particularly prominent in younger individuals.
The sclera, while called the white of the eye, rarely appears pure white in realistic drawings. It contains subtle shadows, particularly near the eyelid edges and in the corners. Small blood vessels create barely visible red lines, though overemphasizing these can make eyes look tired or unhealthy. Add a thin shadow where the upper eyelid meets the eyeball to show dimension. The tear duct area in the inner corner contains pinkish tissue and often holds subtle highlights. These small details accumulated together create the difference between amateur and professional-quality eye drawings.
Step 5: Mastering Light, Shadows, and Highlights
Proper lighting transforms flat drawings into three-dimensional, realistic eyes. The eyeball’s spherical shape means light hits it similarly to drawing a sphere, with highlights on the side facing the light source and shadows on the opposite side. The most prominent highlight, called the catchlight or specular highlight, appears on the cornea where light directly reflects. This highlight typically appears partially on the iris and partially on the pupil, creating the characteristic sparkle that makes eyes appear alive.
Secondary highlights often appear opposite the primary catchlight, resulting from reflected environmental light. The upper eyelid casts a shadow across the top portion of the eyeball, while the lower lid creates a subtle shadow beneath. The eye socket itself creates ambient shadows around the entire eye area. In 2026, professional artists emphasize that shadow placement matters more than detail for creating realistic depth. Squinting at your reference helps identify the most important value changes to include in your drawing.
Drawing Eyelashes Naturally
Eyelashes frame the eye and add finishing touches to your drawing, but they’re often drawn incorrectly by beginners. Eyelashes grow in clusters rather than individual, evenly-spaced hairs. They curve outward from the eyelid, following the lid’s contour. Upper lashes grow longer and more densely than lower lashes, with the longest lashes appearing near the outer portion of the eye. Draw lashes using quick, confident strokes that taper at the ends rather than maintaining uniform thickness.
Avoid drawing every single eyelash, as this creates an unnatural, cluttered appearance. Instead, suggest lashes through selective placement, drawing some individually and others as grouped shapes. Lower lashes appear shorter, sparser, and lighter in value. In realistic drawings, some lashes overlap and cross each other naturally. Female eyes in illustrations often feature more prominent lashes, while male eyes typically show lighter, less emphasized lashes. For anime-style eyes, lashes become more stylized with bold, simplified shapes that still follow the natural growth pattern.
How to Draw Eyes in Different Styles
Different artistic styles require adapted approaches to drawing eyes effectively. Realistic eyes demand attention to anatomical accuracy, subtle value transitions, and detailed textures. Semi-realistic styles simplify some details while maintaining overall proportions and dimensional qualities. These work well for illustration, comics, and character design where you want recognizable human features without photographic precision.
Drawing Realistic Eyes with Pencil
When learning how to draw eyes with pencil, focus on building values gradually through layering. Start with light overall tones, then progressively darken areas that need deeper shadows. Use harder pencils like HB for initial layers and lighter areas, transitioning to softer pencils like 4B and 6B for the darkest values in the pupil and deep shadows. Blending with stumps creates smooth transitions in the iris and sclera, while leaving some pencil strokes visible adds texture and interest.
The graphite pencil allows precise control over value ranges, essential for capturing the subtle tonal shifts in realistic eyes. According to 2026 art supply data, mechanical pencils with 0.5mm leads have become increasingly popular among American artists for detail work in eye drawings. Reserve your darkest values for the pupil center and the deepest shadows, leaving your lightest values for highlights on the cornea and the brightest areas of the sclera. This full value range creates maximum contrast and visual impact.
Drawing Anime and Manga Eyes
Learning how to draw eyes anime style involves understanding the stylistic conventions rather than pure anatomical accuracy. Anime eyes typically appear larger in proportion to the face, with exaggerated highlights that occupy significant portions of the iris. The shape varies by character type, with feminine characters featuring rounder, larger eyes and masculine characters having narrower, more angular eye shapes. The iris contains simplified patterns, often just a few curved lines suggesting texture.
In manga and anime conventions, multiple catchlights create a characteristic sparkle, sometimes including star or geometric shapes. The upper eyelid line appears bold and dark, while lower eyelids may be suggested with minimal or no line. Eyelashes become stylized into thick, triangular shapes or swept curves rather than individual hairs. Color plays a major role in anime eyes, with unrealistic colors like purple, pink, or bright red commonly used to convey character personality. Despite the stylization, successful anime eyes still convey emotion and direction effectively through pupil placement and eyelid positioning.
Drawing Eyes for Different Age Groups
Eye appearance changes significantly across age groups, requiring adjusted techniques when drawing eyes for kids versus adults or elderly subjects. Children’s eyes appear proportionally larger relative to their facial features, with rounder shapes and larger iris-to-eye ratios. The eyelids show less pronounced creasing, and the surrounding skin appears smoother without the wrinkles and texture found in older subjects. Kids’ eyes also tend to have more prominent highlights and appear more reflective, contributing to an innocent, youthful appearance.
Adult eyes show more defined eyelid creases, particularly the fold above the upper eyelid. The skin around eyes develops subtle lines and texture. Elderly eyes feature more pronounced changes including drooping eyelids, deeper creases, crow’s feet radiating from the outer corners, and sometimes a cloudy appearance in the iris or cornea. The lower eyelid may sag, revealing more of the eye’s understructure. When drawing different ages, adjust not just the eye itself but the surrounding facial features and skin texture to maintain age-appropriate characteristics throughout your artwork.
Common Eye Drawing Mistakes to Avoid
Even experienced artists make common errors when learning how to draw eyes step by step. One frequent mistake involves drawing both eyes at dramatically different sizes or angles, creating an asymmetrical appearance that looks unnatural. While human faces naturally contain subtle asymmetries, pronounced differences appear as errors rather than realistic variation. Always compare both eyes regularly during the drawing process, checking that they align on the same horizontal plane and maintain consistent proportions.
Another common issue involves making the sclera too white, which creates a flat, unrealistic appearance. The white of the eye should contain subtle values and shadows, particularly near the eyelid edges. Overworking the iris details while neglecting proper value structure leads to eyes that look labeled rather than dimensional. Beginning artists also frequently draw eyelids as simple lines rather than dimensional forms with thickness. Finally, many learners struggle with pupil and iris ellipses in three-quarter views, drawing circles when ellipses are anatomically correct. Practicing basic ellipse drawing separately improves this specific skill significantly.
Practice Exercises to Improve Your Eye Drawings
Consistent practice with focused exercises accelerates your progress in drawing realistic eyes. Start by creating value scales from your lightest possible mark to your darkest, training yourself to achieve smooth gradations. Practice drawing circles and ellipses at various angles without reference, as these shapes form the foundation of eyes in different perspectives. Spend dedicated time drawing just irises, focusing on the radial pattern variations and textures without worrying about the complete eye structure.
Set up a daily sketch routine where you draw eyes from reference photos, spending 15-30 minutes studying and replicating different eye types, ages, and angles. According to 2026 art education research in the United States, students who maintain daily practice show 3-4 times faster skill improvement compared to sporadic practice sessions. Create studies focusing on specific aspects like eyelash patterns, highlight placement, or shadow mapping. Draw eyes from memory between reference studies to test your understanding of the underlying structure and proportions. This combination of observational and memory drawing builds both technical skill and conceptual knowledge.
Drawing Eyes from Different Angles and Perspectives
Mastering how to draw eyes from various viewpoints demonstrates true understanding of three-dimensional structure. In three-quarter view, the far eye appears narrower due to foreshortening, with the iris becoming a more pronounced ellipse. The eyelid contours follow the eyeball’s spherical surface, curving around the form. Profile views show the eye as a triangular shape with the iris appearing as a complete ellipse rather than a circle, and only one eyelid edge remains visible from this angle.
Looking down at eyes creates a different challenge, as more of the upper eyelid surface becomes visible while the iris becomes partially obscured. Looking up reveals more of the lower lid and the underside of the eyeball. Each perspective requires understanding how the eyelids wrap around the spherical eyeball form. Practice these angles separately before incorporating them into complete portrait drawings. Many American art programs in 2026 emphasize using 3D reference models or apps that allow rotation of anatomically correct eye structures, helping students visualize these complex angular changes more effectively.
Related video about how to draw eyes
This video complements the article information with a practical visual demonstration.
Important things to know about how to draw eyes
How do you draw a really good eye for beginners?
Start by establishing the basic almond shape of the eye, then add the circular iris partially covered by the upper eyelid. Place the pupil in the iris center, add a catchlight highlight, and build shadows gradually. Focus on the overall shape and proportions before adding fine details. Practice the foundational structure repeatedly until you can draw the basic eye shape confidently from memory. Good eyes require understanding the three-dimensional form of the eyeball within the eye socket, which affects how light and shadows fall across the surface.
What are the basic shapes for drawing eyes?
The basic shapes include an almond or oval for the eye opening created by eyelids, a circle or ellipse for the iris depending on viewing angle, and a smaller circle for the pupil. The eyeball itself is spherical, though largely hidden by eyelids. The tear duct area can be simplified as a small triangle in the inner corner. Understanding these fundamental geometric shapes helps you construct eyes accurately before adding realistic details and shading. Practicing these shapes separately builds the foundational skills needed for more complex eye drawings.
How long does it take to learn to draw realistic eyes?
With focused daily practice of 30-60 minutes, most beginners can draw recognizable, decent-quality eyes within 2-3 weeks. Achieving truly realistic, professional-level eyes typically requires 3-6 months of consistent practice. The timeline varies based on prior drawing experience, quality of instruction, and practice consistency. Breaking down the eye into components and practicing each separately accelerates learning. Many successful artists in 2026 recommend spending at least 100 hours specifically on eye studies before expecting professional results in portrait work.
Should I draw both eyes at the same time or one completely first?
Drawing both eyes simultaneously in stages produces better symmetry and proportion. Establish the basic shapes for both eyes, then develop details on both progressively rather than completing one entirely first. This approach allows constant comparison and adjustment to maintain matching sizes, angles, and expressions. If you complete one eye fully before starting the second, you may struggle to replicate the same level of detail and style. Professional portrait artists typically work across the entire face in layers rather than finishing individual features in isolation.
What’s the most important aspect of drawing realistic eyes?
Proper value structure and shadow placement matter most for realistic eyes, even more than fine details. The eye’s three-dimensional form must be convincingly rendered through accurate shadows and highlights. The catchlight highlight brings eyes to life, while shadows under the upper eyelid and around the eye socket create necessary depth. Many beginners focus excessively on iris details while neglecting proper shading, resulting in flat-looking eyes. Master the underlying form, light, and shadow before worrying about intricate details like individual eyelashes or iris patterns.
How do I make my drawn eyes look more alive and expressive?
Eyes appear alive through proper catchlight highlights, accurate pupil direction, and consideration of the surrounding facial muscles. The catchlight creates that characteristic sparkle of living eyes. Ensure both pupils look in exactly the same direction, as misaligned gaze appears lifeless or unfocused. Consider the emotional context and adjust eyelid positions accordingly—slightly lowered lids suggest calm or tiredness, while wide-open lids convey alertness or surprise. The eyebrows and muscles around eyes contribute significantly to expression, so never draw eyes in complete isolation from surrounding facial features.
| Drawing Stage | Key Techniques | Common Pitfalls to Avoid |
|---|---|---|
| Foundation Structure | Light guidelines, basic oval shape, eye socket consideration | Drawing too dark initially, incorrect proportions |
| Eyelid Definition | Showing eyelid thickness, proper curve asymmetry | Drawing lids as simple lines, ignoring dimension |
| Iris and Pupil | Partial coverage by upper lid, centered pupil, ellipses in angles | Showing full iris, misaligned pupils between eyes |
| Detail Addition | Radial iris patterns, limbal ring, subtle sclera shadows | Overworking details, making sclera pure white |
| Shading and Light | Catchlight placement, graduated values, cast shadows | Insufficient value range, ignoring light source |
| Finishing Touches | Selective eyelash grouping, final highlight refinement | Drawing every individual eyelash, over-rendering |