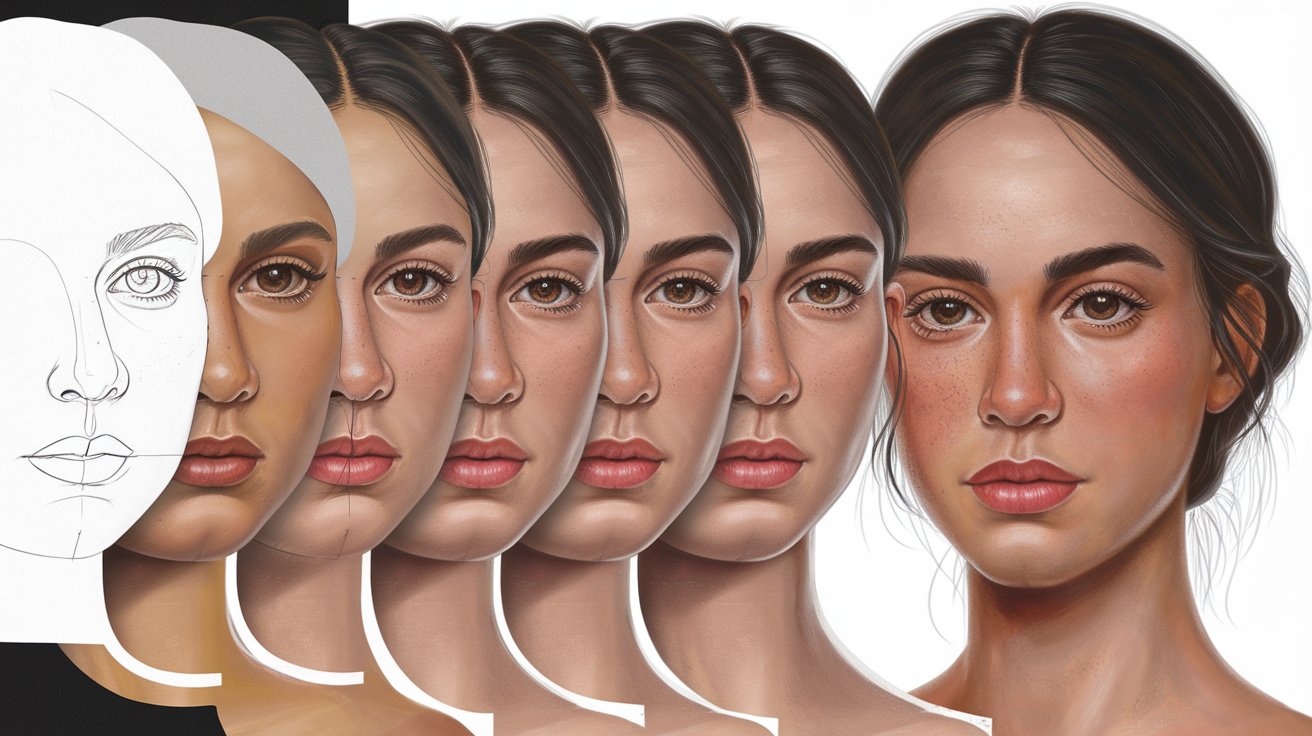
Learning how to draw people effectively requires understanding fundamental anatomy, proportion, and gesture. Whether you’re sketching a person full body or focusing on facial features, mastering human figure drawing unlocks creative expression across illustration, animation, and fine art. This comprehensive guide provides actionable techniques used by professional artists in 2026, helping you progress from basic stick figures to realistic human drawings with confidence and accuracy.
Why Drawing the Human Figure Remains Challenging in 2026
The human figure presents unique difficulties that challenge both beginners and experienced artists. Unlike static objects, people possess complex anatomical structures with bones, muscles, and joints that interact dynamically. The human body contains approximately 206 bones and over 600 muscles that shift with every pose, creating endless variations in form and shadow. Our brains are highly attuned to recognizing human faces and bodies, making even minor proportional errors immediately noticeable in ways that wouldn’t register with other subjects.
According to 2026 art education research from leading US institutions, approximately 73% of beginning artists cite proportion accuracy as their primary struggle when learning how to draw people. The relationship between head size, torso length, and limb proportions must maintain specific ratios for drawings to appear natural. Additionally, capturing the subtle asymmetry that makes faces feel alive rather than rigid requires understanding both technical rules and when to break them. The easiest way to overcome these challenges involves systematic practice with proven methods that build muscle memory and visual understanding simultaneously.
Essential Materials for Drawing People
Selecting appropriate drawing materials significantly impacts your learning progression and final results. Professional artists in the United States typically recommend starting with quality graphite pencils ranging from 2H for light construction lines to 6B for deep shadows. A standard drawing pencil set should include HB, 2B, 4B, and 6B grades, providing versatility for different mark-making techniques. Invest in smooth bristol paper or medium-tooth drawing paper rated at least 70 lb to handle erasing and layering without deterioration.
Beyond pencils, a kneaded eraser allows precise highlight recovery while maintaining paper integrity better than standard erasers. Many contemporary artists supplement traditional tools with digital tablets from manufacturers like Wacom or iPad Pro with Apple Pencil, which offer pressure sensitivity and unlimited undo capabilities ideal for experimentation. A basic sketchbook for daily gesture drawing practice should accompany formal drawing sessions. The US art supply market in 2026 offers student-grade complete sets starting around $25 to professional combinations exceeding $200, though mid-range options between $50-$80 provide excellent quality for developing skills in how to draw people realistically.
The Foundation Method: Building with Basic Shapes
Every complex human figure simplifies into fundamental geometric shapes that provide structural scaffolding. Professional illustrators begin by visualizing the head as an oval or circle, the torso as a modified rectangle or rounded cylinder, and the pelvis as an inverted triangle or trapezoid. This reductionist approach allows artists to establish accurate proportions before committing to anatomical details. The technique, refined over centuries and validated by contemporary art programs across US universities, reduces cognitive load by breaking overwhelming complexity into manageable components.
Start every person drawing by lightly sketching these basic shapes in proper relationship to each other. The standard adult human body measures approximately 7.5 to 8 heads tall, with the legs comprising roughly half the total height. The shoulders span about 2 to 3 head widths, while the hips measure slightly narrower. These ratios remain consistent whether you’re learning how to draw people for kids or pursuing photorealistic portraiture. Practice filling entire pages with overlapping circles, ovals, rectangles, and cylinders in various sizes, training your hand to create these shapes fluidly and confidently without conscious effort.
The Stick Figure Foundation Technique
The humble stick figure represents far more than childish doodling when used strategically by professional artists. This simplified representation captures essential pose dynamics, gesture, and movement without anatomical distraction. Contemporary figure drawing instruction emphasizes gesture drawing sessions where artists create 30-second to 2-minute stick figure sketches capturing action and energy rather than detailed anatomy. This practice develops the crucial ability to perceive and translate movement onto paper, skills that remain foundational regardless of final style preferences.
Constructing Your Anatomically-Informed Stick Figure
Advanced stick figures incorporate anatomical landmarks that guide accurate proportion and articulation. Begin with a circle representing the skull, adding a centerline to indicate facial direction. From the head’s base, draw a curved line representing the spine, noting that the spine creates an S-curve in profile rather than remaining straight. Mark shoulder width with a horizontal line perpendicular to the spine at approximately one head-length below the skull. The ribcage attaches here, and another horizontal line marking hip width appears roughly 2 to 2.5 head-lengths down from the skull, depending on the figure’s proportions.
Limbs extend from shoulder and hip points, with joints marked by small circles at elbows, wrists, knees, and ankles. The upper arm and forearm should measure approximately equal lengths, totaling about 3 head-heights when extended. Similarly, the thigh and lower leg each measure roughly 2 head-heights. These proportional guidelines ensure your stick figure foundation supports realistic anatomy when fleshed out. Practice creating stick figures in diverse poses including standing, sitting, running, and reaching positions. This exercise builds understanding of how joints bend, weight distributes, and balance maintains across different activities essential for convincing human figure drawing.
Dynamic Gesture and Action Lines
Professional artists use a central action line or line of action that flows through the entire figure, capturing the pose’s essential movement and energy. This swooping line represents the primary directional thrust of the body’s gesture, whether a dancer’s arc, an athlete’s forward momentum, or a relaxed contrapposto stance. The action line typically runs from the head through the torso and into the weight-bearing leg, creating visual unity and dynamic flow throughout the composition.
When practicing gesture drawing, spend 80% of your limited time establishing this action line and basic stick figure proportions before adding any volume or detail. This approach forces you to prioritize capturing life and movement over rendering techniques. Leading US art schools including Rhode Island School of Design and California Institute of the Arts structure foundational courses around hundreds of rapid gesture drawings, recognizing that this practice develops observational skills faster than prolonged detailed studies. Dedicate 15-20 minutes daily to rapid gesture sketches to accelerate your progression in learning how to draw people with vitality and authenticity.
Adding Volume: From Stick Figures to Three-Dimensional Forms
Transforming linear stick figures into volumetric forms requires understanding how geometric solids wrap around the skeletal armature. Replace stick-figure lines with cylinders for arms and legs, spheres for joints, and modified boxes or egg shapes for the torso and head. This technique, called constructive anatomy, helps artists visualize how light interacts with three-dimensional forms and how body parts overlap from different viewing angles. The cylinder model particularly helps beginners understand foreshortening when limbs extend toward or away from the viewer.
Apply this volume building technique systematically, working from large forms to smaller details. The torso simplifies into two main masses: the ribcage (a modified egg shape wider at top) and the pelvis (an inverted bowl or bucket shape). Connect these masses with the flexible spine, allowing for bending and twisting movements. Arms attach to the ribcage at shoulder sockets, each upper arm forming a tapering cylinder that narrows toward the elbow. The forearm reverses this taper, widening slightly toward the wrist where muscle mass concentrates. Legs follow similar principles with thigh cylinders widening at the hip joint and tapering toward knees, while calves create distinctive bulges in the lower leg.
Practice sheets dedicated to drawing these volumetric forms from multiple angles dramatically accelerate understanding of three-dimensional structure. Sketch cylinders, spheres, and boxes rotated in space with consistent light sources to develop shading skills. According to 2026 data from US art education programs, students who complete 50+ hours of volume-study exercises demonstrate 40% faster improvement in figure drawing accuracy compared to those who skip this foundational work. This investment in understanding basic forms pays continuous dividends as you progress toward realistic people drawing.
Mastering Human Proportions and Measurements
Accurate proportion separates convincing human figures from awkward attempts, making proportional systems essential knowledge for any artist. The classical measurement system uses the head as a standard unit, with the average adult standing 7.5 to 8 heads tall. Specific landmarks provide reliable reference points: the nipple line appears at 2 head-heights, the navel at 3 heads, the pubic bone at 4 heads (exactly halfway down the body), the bottom of the kneecap at 6 heads, and the feet at 8 heads from the top of the skull.
Width measurements maintain similar consistency across individuals. The shoulders of an adult male span approximately 2 to 3 head-widths, while female shoulders measure slightly narrower at 2 to 2.5 head-widths. The waist narrows to about 1.5 head-widths, and the hips measure 2 to 2.5 head-widths depending on body type and gender. Hand length approximates the distance from chin to hairline, while feet measure slightly longer than one head-height. These proportional relationships remain consistent regardless of actual size, allowing artists to draw figures at any scale while maintaining natural appearance.
Children’s proportions differ significantly from adults, with younger subjects displaying relatively larger heads and shorter limbs. A newborn measures only 4 heads tall, a 5-year-old approximately 6 heads, and proportions gradually approach adult ratios through adolescence. When learning how to draw people for kids, these modified proportions help create age-appropriate characters. Practice measuring your reference images or live models using the head-height system, marking proportional divisions directly on your construction sketches. This analytical approach trains your eye to recognize proportional errors intuitively, eventually eliminating the need for conscious measurement in every drawing.
How to Draw People Face: Features and Expressions
The human face concentrates incredible complexity into a small surface area, requiring dedicated study separate from full-body figure work. Facial proportions follow reliable guidelines that serve as starting points before individual variation. On an average adult face, the eyes sit halfway between the top of the head and the chin, not higher as beginners often assume. The space between the eyes equals approximately one eye-width, and the outer corners of the mouth align vertically with the pupils when viewed straight-on.
The nose length typically equals the distance from the eyes to the chin, with the nose bottom appearing halfway between eyes and chin. Ears extend from eyebrow level to nose bottom, providing useful reference points for profile drawings. The facial structure simplifies into geometric planes that catch light differently: the forehead plane faces slightly forward, the nose projects outward, and the jaw creates an angular bottom plane. Understanding these planes helps create convincing light and shadow patterns that give faces three-dimensional form.
Drawing Realistic Eyes and Eyebrows
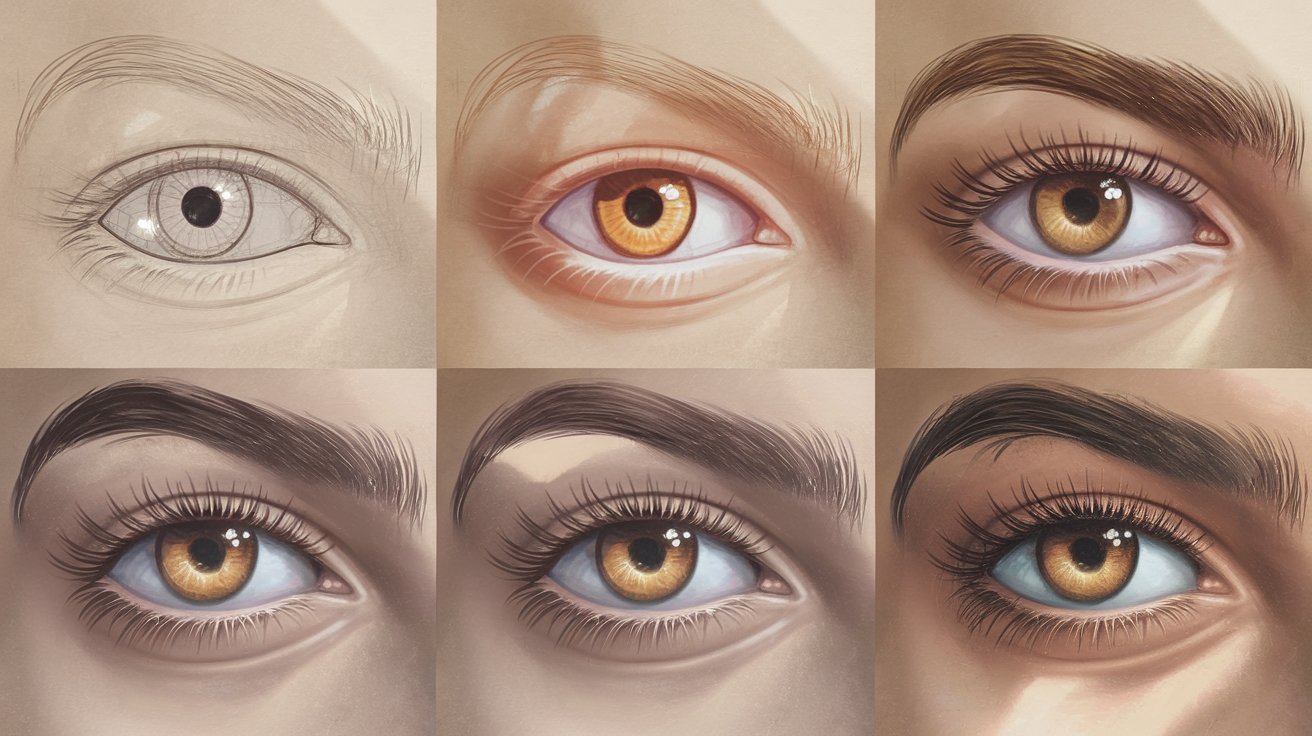
Eyes convey emotion and personality more than any other facial feature, making them crucial for expressive portraiture. The eyeball itself forms a perfect sphere housed within the eye socket, with only a portion visible between the eyelids. Many beginners draw eyes as flat almond shapes, missing the volumetric quality that brings them to life. Start by sketching a circle representing the iris, which gets partially covered by the upper eyelid in most views. The upper lid follows the sphere’s curve, creating thickness at its edge where eyelashes emerge.
The pupil appears as a dark circle centered within the iris, with a white highlight typically positioned at approximately 2 o’clock or 10 o’clock depending on light source direction. This highlight placement remains consistent across both eyes, maintaining lighting coherence. Eyebrows follow the brow bone’s arc, typically starting above the inner eye corner, peaking above the outer iris edge, and tapering toward the temple. Individual hairs follow the growth direction, generally angling upward and outward from the nose. The area between eyebrow and eyelid creates a subtle shadow that adds depth and realism to the eye region.
Capturing Nose and Mouth Accurately
The nose structure consists of a rigid upper bridge formed by bone, transitioning to flexible cartilage at the tip and nostrils. From the front view, suggest the nose primarily through nostril shapes and strategic shadows rather than outlining every edge, which creates harsh, unrealistic results. The nose bridge receives direct light in most positions, remaining relatively light in value, while the underside of the nose tip and the nostril cavities create darker shadows. Profile views require more defined edges showing the bridge angle, tip projection, and nostril curve.
The mouth and lips follow the jaw’s gentle curve, never appearing as a flat line across the face. The upper lip typically appears slightly darker than the lower lip because it angles away from overhead light sources, while the lower lip catches more light and appears lighter in value. The corners of the mouth recede into the face, creating small shadows that define where lips end. The philtrum, that vertical groove running from nose to upper lip, adds realism when subtly indicated. The lower lip sits above the chin with a gentle shadow beneath, particularly pronounced in certain lighting conditions. Practice drawing facial features individually from photographs before combining them into complete portraits, building confidence with each element separately.
Drawing Hands and Feet: Complex Extremities Simplified
Hands and feet challenge even experienced artists due to their complex joint systems and range of positions. The human hand contains 27 bones creating intricate capability for grasping, pointing, and gesturing. Simplify hands initially by seeing the palm as a rounded square or pentagon with fingers extending as tapering cylinders. The fingers align at consistent landmarks: when making a fist, fingertips form a curved line, middle knuckles form another curve, and base knuckles create a third arc across the hand’s back.
The thumb operates on a different plane from fingers, extending from the hand’s side rather than the top, allowing opposable gripping. Thumb length reaches approximately to the index finger’s lowest knuckle when relaxed alongside the palm. Each finger contains three segments with joints creating bending points, while the thumb has only two segments. The index finger typically reaches the longest finger’s nail, while the ring finger extends to the longest finger’s top knuckle, and the pinky barely reaches the ring finger’s top knuckle.
Feet structure mirrors hands in complexity but supports weight rather than manipulating objects. The foot forms a wedge shape in profile, with the heel providing stability and the toes creating propulsion during walking. The arch curves upward on the inner foot edge, while the outer edge remains relatively flat. Toes decrease progressively in length from big toe to pinky toe, though proportions vary among individuals. The ankle sits higher on the inner leg than outer, creating asymmetry visible from front views. Practice sketching hands and feet in various positions daily, using your own appendages as convenient reference models to accelerate learning how to draw people with anatomical accuracy.
Creating Dynamic Poses and Natural Movement
Static, stiff figures plague beginners who focus excessively on accuracy while neglecting gesture and movement. Natural human poses incorporate weight distribution, balance, and contrapposto, the classical stance where weight rests primarily on one leg while the other relaxes. This weight shift creates a subtle tilt in the hips and compensating angle in the shoulders, producing an S-curve through the torso that appears more natural than rigid vertical alignment. The weight-bearing leg appears straighter while the relaxed leg bends slightly at the knee.
Understanding the center of gravity helps create believable standing poses. A vertical line dropped from the head’s center should pass through the weight-bearing foot’s arch to maintain balance in standing figures. When the figure leans, reaches, or moves, the center of gravity shifts, requiring compensating body adjustments to prevent falling. Running figures lean forward with the center of gravity ahead of the feet, while figures carrying heavy objects shift their pose to keep the combined center of gravity over their base of support.
Action poses benefit from exaggeration, pushing angles and curves slightly beyond natural limits to enhance dynamism and visual interest. Comic book artists and animators regularly apply this principle, creating characters that feel more alive precisely because they aren’t photographically accurate. When learning how to draw people in motion, study action photography from sports, dance, and everyday activities, analyzing how bodies adapt to maintain balance during various movements. The US reference photography market in 2026 offers extensive subscription services providing pose libraries specifically for artists, with collections ranging from subtle expressions to extreme athletic positions.
Adding Clothing and Fabric Dynamics
Clothing follows the body’s underlying form while adding its own characteristic folds, drapes, and wrinkles based on fabric type and fit. Tight-fitting clothes like t-shirts or leggings closely follow body contours, stretching across protruding areas like shoulders, chest, and knees while compressing in bent areas like elbows and waist. Loose clothing creates its own shapes that partially obscure the body, hanging from high points like shoulders and hips with fabric draping between contact points following gravity.
Different fabric types behave distinctly: stiff materials like denim create sharp, angular folds, while soft fabrics like silk flow in smooth, curved drapes. Stretch fabrics cling and compress, creating horizontal wrinkles across stretched areas. Understanding five basic fold types covers most clothing situations: pipe folds hang vertically from a suspension point, diaper folds drape between two points, zigzag folds appear in compressed fabric, spiral folds wrap around cylindrical forms, and half-lock folds occur where fabric hangs and catches on something before continuing downward.
Wrinkles and fold patterns concentrate at joints where bending occurs—elbows, knees, waist, and shoulders. Study how your own clothing behaves during different movements, noting where fabric bunches, stretches, or hangs freely. When drawing clothed figures, sketch the nude figure underneath first using construction lines, then add clothing on top respecting how it interacts with the body’s form. This two-step process prevents common errors where clothing appears to float independently or lacks convincing underlying structure. Professional character designers and fashion illustrators in the US follow this workflow consistently, ensuring anatomical accuracy beneath even the most elaborate costume designs.
Light, Shadow, and Three-Dimensional Form
Effective shading transforms flat line drawings into three-dimensional forms with volume and presence. Light behavior follows predictable principles: surfaces facing the light source appear lightest, surfaces perpendicular to light receive moderate illumination, and surfaces facing away from light appear darkest. The transition between light and shadow, called the terminator, creates the strongest value contrast and visually describes form most effectively. Within the shadow area, reflected light bounces from surrounding surfaces, slightly illuminating the shadow side and preventing it from appearing completely black.
The five-value system provides a simplified approach for rendering form: highlight (lightest areas receiving direct light), light (areas facing light but not receiving direct reflection), midtone (surfaces perpendicular to light), shadow (areas facing away from light), and core shadow (darkest area where light completely blocked). A sixth value, reflected light, appears within the shadow region where bounce light provides subtle illumination. Practice rendering simple geometric forms like spheres, cylinders, and cubes with consistent lighting before applying these principles to complex human anatomy.
Different light sources create distinct moods and shadow patterns. Direct overhead sunlight creates short, dramatic shadows directly below forms, while low-angle sunset light produces long shadows and warm color temperatures. Overcast lighting minimizes shadows, creating even, soft illumination ideal for detailed work but requiring careful attention to subtle value shifts that describe form. Indoor artificial lighting creates harder-edged shadows and often involves multiple light sources that require analyzing each light’s contribution separately. In 2026, many US-based digital artists use 3D reference programs like Daz3D or Clip Studio Paint’s posable models to understand complex lighting scenarios before rendering final artwork, combining traditional skills with contemporary technology.
Effective Practice Routines and Drawing Exercises
Structured practice routines accelerate skill development more effectively than random drawing sessions. Professional artists and educators recommend dividing practice time into focused areas rather than always attempting complete finished pieces. Daily gesture drawing sessions lasting 15-20 minutes build observational speed and capture essential pose dynamics without becoming bogged down in details. Use a timer and work from photo references or video stills, creating 30-second, 1-minute, and 2-minute sketches that prioritize action lines and basic proportions.
Supplement gesture work with anatomical studies focusing on specific body parts. Dedicate sessions to drawing only hands in various positions, another day to feet, another to facial features. This targeted approach builds expertise systematically rather than spreading attention too thinly. Fill sketchbook pages with specific elements: twenty different nose angles, thirty eye expressions, dozens of hand gestures. The repetition builds muscle memory and pattern recognition that eventually operates automatically during complete figure work.
Longer study sessions of 1-3 hours should involve more finished pieces working from quality photo references or life models if available. The American Society of Figure Drawing reported in 2026 that artists participating in weekly life drawing sessions showed 35% faster improvement than those working exclusively from photographs. Live models provide authentic three-dimensionality, subtle color variations, and breathing movement that photographs cannot replicate. Many US cities offer open figure drawing sessions at community centers, art schools, and dedicated studios, with session costs typically ranging from $10-25 per 2-3 hour session. Combining photograph studies for convenience with regular live sessions when possible creates optimal learning conditions for mastering how to draw people effectively.
Digital Tools and Resources for Learning Figure Drawing
Contemporary artists in 2026 benefit from unprecedented digital resources that complement traditional drawing methods. Online platforms like Proko, New Masters Academy, and Schoolism offer structured video courses taught by professional artists, breaking down complex concepts into digestible lessons. These subscription services typically cost $20-40 monthly, providing libraries of content covering anatomy, gesture, portraiture, and stylization. Free resources including YouTube channels from artists like Sinix Design, Moderndayjames, and Ethan Becker deliver quality instruction without cost, though content organization may be less systematic than paid courses.
Reference photo libraries have expanded dramatically with sites like Line of Action, Quickposes, and Bodies in Motion offering thousands of timed figure drawing poses specifically for practice. These platforms simulate traditional figure drawing sessions by displaying images for user-defined durations, encouraging rapid sketching and gesture capture. Three-dimensional posable figure software including Daz3D, Magic Poser, and Clip Studio Paint’s built-in models allow artists to create custom reference angles and lighting conditions impossible to achieve with photography alone.
Social media communities on platforms like Instagram, ArtStation, and DeviantArt provide feedback, inspiration, and motivation through shared work and challenges. The art education technology market in the United States reached $450 million in 2026, reflecting massive investment in digital learning tools. However, technology serves as supplement rather than replacement for fundamental skills. A 2026 study by the National Art Education Association found that students who balanced digital tools with traditional pencil-and-paper practice demonstrated 28% better fundamental understanding than those using exclusively digital methods. The tactile feedback, permanence of marks, and absence of undo functions in traditional media build decision-making skills and mark confidence that transfer beneficially to all artistic media.
Common Mistakes When Learning How to Draw People
Recognizing and correcting common errors prevents reinforcing bad habits that impede progress. The most prevalent mistake involves beginning with details before establishing overall structure and proportions. Artists who start rendering an eye or mouth before mapping the complete head inevitably encounter proportional problems requiring extensive correction. Always work from general to specific, establishing gesture, basic shapes, and proportions before refining any individual feature.
Another frequent error involves drawing symbols rather than observing actual forms. Beginners often draw what they think eyes, noses, or hands should look like based on simplified mental symbols rather than studying how these features actually appear from various angles. This symbolic drawing produces generic, unconvincing results. Force yourself to spend 80% of drawing time actually observing the reference and only 20% looking at your paper, training your eye to see accurately rather than relying on preconceptions.
Many developing artists neglect negative space, focusing exclusively on the figure itself while ignoring the shapes created between and around body parts. Negative space provides powerful tools for checking proportions and relationships. If the space between a model’s arm and torso doesn’t match your drawing’s negative space, something is misaligned even if you can’t immediately identify what. Practice drawing only the negative spaces in reference photos, filling in the surrounding shapes while leaving the figure blank—this exercise dramatically improves spatial awareness.
Insufficient value range creates flat, unconvincing drawings lacking depth and dimension. Beginning artists often work too lightly, never achieving truly dark darks or preserving bright highlights. A full value range from paper-white to rich darks creates drama and dimension. Reserve your lightest lights for primary highlights, use middle values for most areas, and push shadows darker than feels comfortable initially. Reference your drawing against source material by squinting, which eliminates detail and reveals whether value patterns match. Finally, avoid the perfectionism trap that prevents completing drawings or attempting challenging poses—every sketch, successful or not, builds skills that compound over time toward mastery of how to draw people.
Related video about how to draw people
This video complements the article information with a practical visual demonstration.
Questions & Answers
What is the easiest way to draw people?
The easiest way to draw people involves starting with basic stick figures to establish pose and proportions, then adding simple geometric shapes like cylinders for limbs and ovals for the torso and head. This constructive approach builds complex figures from manageable components. Focus first on capturing the gesture and overall proportions using the head-height measurement system where adults measure approximately 7.5-8 heads tall. Begin all drawings with light construction lines before committing to darker final marks, allowing easy correction of proportional errors. Practice rapid gesture drawings for 15-20 minutes daily to build observational skills and hand-eye coordination faster than attempting detailed finished pieces initially.
How can I draw realistic people?
Drawing realistic people requires understanding human anatomy, accurate proportions, and effective light-and-shadow rendering. Study skeletal and muscular systems to understand how underlying structures create surface forms visible in finished drawings. Use consistent measurement systems ensuring the eyes sit halfway down the head, shoulders span 2-3 head widths, and body segments maintain correct length relationships. Develop full value ranges from paper-white highlights to rich dark shadows, as effective shading creates three-dimensional form more than linear details. Work from quality photo references or live models rather than imagination until fundamental skills solidify. Professional realism typically requires 500+ hours of dedicated practice, but noticeable improvement appears within the first 50 hours when using proper techniques and structured practice routines.
How do you draw a person full body?
Drawing a full body person starts with establishing the action line capturing the pose’s essential gesture and energy. Next, create a proportional stick figure marking major joints at shoulders, elbows, wrists, hips, knees, and ankles using the head-height system where the body measures 7.5-8 heads tall. Add basic geometric volumes by replacing stick lines with cylinders for limbs, ovals for the head, modified boxes for torso, and appropriate shapes for hands and feet. Refine proportions ensuring legs comprise approximately half total height, shoulders align 1-1.5 heads below skull top, and hips appear at the 4-head mark. Once basic volumes are correct, add anatomical details, contours, clothing, and finally shading to create three-dimensional form. This systematic approach from gesture to structure to detail ensures accurate proportions and natural poses.
How long does it take to learn to draw people well?
Learning to draw people competently typically requires 200-500 hours of focused practice over 6-18 months, though significant improvement becomes visible within the first 50 hours when using effective methods. The timeline varies based on practice frequency, quality of instruction, natural aptitude, and definition of proficiency. Dedicating one hour daily to structured exercises including gesture drawing, anatomical studies, and complete figure work produces noticeable results within 2-3 months. Professional-level figure drawing skills generally require 2000+ hours distributed over several years of consistent practice. The 2026 American Society of Figure Artists reports that students participating in weekly life drawing sessions combined with daily independent practice achieve intermediate proficiency approximately 40% faster than those practicing sporadically or exclusively from imagination without reference.
What should beginners practice when learning to draw people?
Beginners should prioritize gesture drawing sessions capturing poses in 30-second to 2-minute sketches, focusing on action lines, basic proportions, and overall pose energy rather than details. This builds essential observational speed and hand-eye coordination. Supplement gesture work with targeted anatomical studies focusing on individual body parts—dedicated sessions drawing only hands, feet, eyes, or noses from multiple angles. Practice constructing figures using basic geometric shapes including cylinders, spheres, and boxes to understand three-dimensional form. Study proportion systems using the head-height measurement method until standard relationships become intuitive. Regular value-scale exercises rendering simple forms like spheres and cylinders with full light-to-dark ranges develop crucial shading skills. Finally, maintain a daily sketchbook habit drawing from life whenever possible, sketching people in cafes, parks, and public spaces to build comfort working quickly from real-world observation.
Do I need to study anatomy to draw people?
While possible to draw people without formal anatomy study, understanding basic skeletal and muscular systems dramatically accelerates improvement and enables more convincing, dynamic figures. Artists need not memorize every muscle’s Latin name, but recognizing major bone landmarks, primary muscle groups, and how joints articulate provides essential knowledge for accurate figure construction. Surface anatomy—understanding which underlying structures create visible forms, bulges, and contours—proves most relevant for artists compared to medical-level detail. Many successful illustrators and comic artists work with simplified anatomical understanding focused on proportions, volumes, and how forms change during movement. However, portrait artists, medical illustrators, and fine artists pursuing realism benefit from deeper anatomical knowledge. The investment of 20-30 hours studying basic anatomy returns substantial dividends through improved figure drawing accuracy and reduced reliance on reference materials for every pose.
| Drawing Aspect | Key Technique | Practice Method |
|---|---|---|
| Basic Proportions | Use head-height measurement system (7.5-8 heads tall) | Measure reference photos and mark proportional divisions |
| Gesture & Movement | Establish action line and stick figure foundation | Daily 15-minute rapid gesture drawing sessions |
| Three-Dimensional Form | Build figures using geometric volumes (cylinders, spheres) | Draw basic shapes from multiple angles with shading |
| Facial Features | Eyes at head-center, features follow proportional landmarks | Isolated studies of individual features from various angles |
| Hands & Feet | Simplify to geometric shapes before adding detail | Draw your own hands in 20+ different positions weekly |
| Light & Shadow | Apply five-value system with full dark-to-light range | Render geometric forms with consistent light direction |